
"Poor Man Buys Twice"
- Apr 7, 2020
- 7 min read

This may be a hard article to stomach if your wallet is tight. I understand, I was once in your shoes when I began backpacking and majority of my kit has been replaced multiple times over the years due to weight and superior products. I've gone through five shelters, three sleep systems, three or four hiking shoes, and two backpacks. Check out my current gear list HERE! This was wasteful and expensive which could have been avoided with better research.
There is hope! As a beginner, you'll walk into your nearest outdoor dealer and be overwhelmed at the vast array of options, prices, and poor recommendations made by sales clerks. To be honest, you are better served avoiding the box stores for bigger purchases, see below for my "big 4" recommendations, most come from cottage companies. Create a game plan before heading to these stores to prevent buying every tchotchke available and being persuaded to buy something you'll replace in a year.
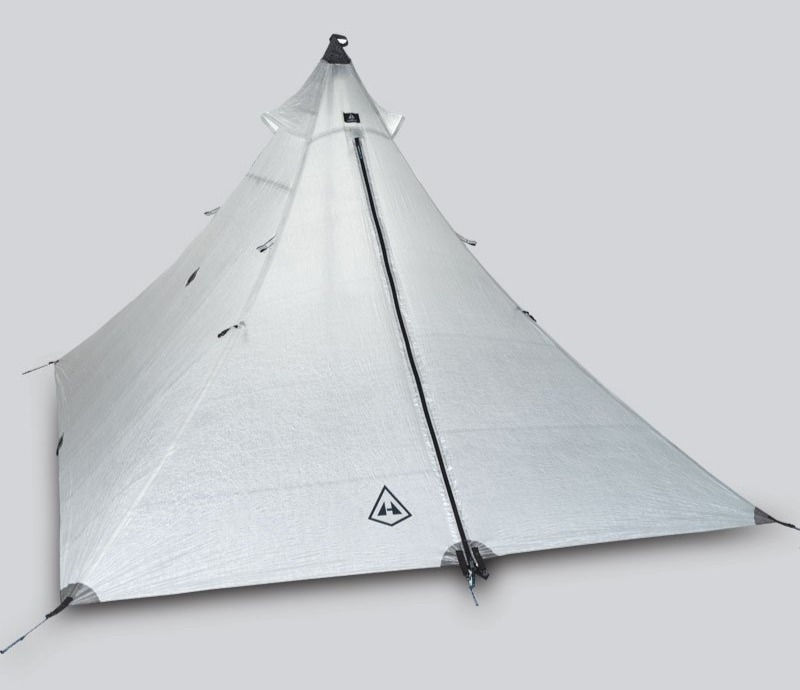
SHELTER
Shelter is your home on the trail and safety net in terrible storms. Spending time researching value will save you multiple headaches and purchases in the future. For those who are <6ft or hike solo, a 1p shelter will be plenty fine and save you weight. Taller and larger people will benefit from a 2p shelter or those planning thru hikes as you'll spend a lot of time weathering storms and having plenty of room is a major bonus. Few things to consider are double wall vs single wall (expecting wet, humid environments, grab a double wall) and trekking pole supported or pole system (trekking pole systems will be lighter and more durable in windy conditions).
TIPS:
1. Decrease weight by exchanging out for UL style stakes. MSR groundhogs and Eastons are fan favorites in the UL community for weight to durability ratio.
2. Hammocks may seem like a great idea but will run you higher weights and costs; avoid.
3. Don't knock out cottage companies for gear. Notoriously thought to have high price tags, many do offer affordable entry level tents that will carry you far into your backpacking career.
4. READ & WATCH REVIEWS on any tent you are considering, you need to make sure it matches your anticipated uses. People may recommend great tents for desert life that will never stand up to PNW climates. An informed purchase is going to make a major difference in your wallet.
5. Skip the groundsheet "specifically designed for your tent." They are heavy and expensive. If you are really concerned, purchase polycro or Tyvek from Home Depot and cut to size.
SLEEP SYSTEM
Dialing in your sleep system is going to be a matter of personal preference (hot/cold sleeper) and what environments you'll be encountering. As one of the "big 4" these items will run your bill up higher but investing in a proper sleep system will mean all the difference on the trial.
1. Quilts will generally be cheaper and lighter than traditional mummy sleeping bags. They allow for a range of climates by cinch down in cold weather, use as a blanket in warmer weather. For those who are side sleepers or toss and turn, a wide quilt is a major improvement over confined bags. 20F quilts are a good place to start for 3 season overnights.
2. Synthetic vs Down. Synthetics claim to fame is its ability to keep you warm while wet. However this claim fails to mention, it will be miserable and you'll be hiking out the next day. With good care and purchase of a tent that avoids condensation, down will serve you much longer in life. Down compresses smaller and has a higher warmth to weight ratio. If you can afford it, down is the best purchase you can make even living in wetter climates.
3. Foam vs Inflatable Pad: this is going to be a personal preference. Foam pads are light, extremely durable, but at a cost of comfort. Inflatables are quite comfortable, lightweight, and pack down small but have a risk of being punctured. Avoid self inflating pads as they are heavy and don't pack down well.
PACKING
Another of the "big" purchases is going to be your backpack. It is recommended to buy this piece of gear LAST so that you are aware of all your gear volume. This is a great opportunity to buy used gear as well since many are indestructible and people only upgrade either for comfort reasons or lighter/paired down systems.
Consider what you have planned in the future? Short mileage, fun trips with friends and family? Thru hiking? Multisport (ie climbing, ski touring)? Ultralight? If your goal is to go UL why would your first bag be a 70L Osprey and vise versa, if your goal is fun weekend trips and UL bag is probably not for you.
Final note, purchase one waterproof pack liner (if you don't go DCF) rather than multiple smaller waterproof bags to protect your gear inside. Garbage bags work well but are less environmentally friendly. Plastic gallon ziplocs are great reusable bags for keeping your gear organized and easy to spot what is inside. Forgo expensive stuff sacks.
CAMP KITCHEN
Personally, a warm meal is worth everything to me and I have been unable to bring myself to cold soak during any of my trips. Cold soaking is popular on long distance treks. However, if you are new or also need a warm meal here are recommendations!
1. Cooking Pot:
Jump right into the titanium game. Unbelievably lightweight, indestructible, and relatively cheap. Toaks and Evernew are great products. Plan for ~1L if cooking inside the pot or ~600mL for just boiling. You do not need a frying pan, don't buy the pot + frying pan/lid combos as they are a waste of space and weight.
2. Stove
- DIY an alcohol stove and utilize white gas for fuel, cheap and readily available
- Canister attached stoves are lightweight, small, and relatively cheap. Higher end priced will be the MSR Pocketrocket, my go to choice but many similar options on Amazon
3. Eating
- Long spoon or spork to reach deep into your meal bags without getting dirty
AVOID:
- Expensive systems like JetBoil as they are heavy, only good for boiling water, and expensive. - "Fun" stoves such as twig stoves as they take forever and continuously need to be stoked. Many areas of the country are now banning these due to cost.
- Aluminium and Stainless Steel are cheaper but heavier alternatives to Titanium but you'll find yourself replacing faster and wanting the weight savings that T provides. - Gadgets such as spice containers, separate fork/knife/spatulas, cutting board, fuel canister holder.
- Bowels, cups, plates are not needed in the back country, especially if you plan to use backpacking meals. Eat out of your pot. Would consider a small lightweight mug for coffee/tea if you enjoy that! This cup works great
CLOTHING
Your first instinct is going to be buying anything with "technical" added to clothing but stop right there. Companies use this marketing gimmick to sucker you into purchasing all their products despite them not being suited for the outdoors. This is especially evident at stores such as REI who will place everyday street wear next to extremely technical pieces and people will make incorrect purchases at a premium price.
Learning to properly layer and bring only what you need is going to save you money in the long run and keep you much more comfortable while hiking and at camp. These items add up but buying last years model will mitigate the cost dramatically. I'll drop a few recommendations below of tried and true options however you need to assess the climate you expect to hike in to properly dial in your layers.
AVOID:
- Multiple outfits on your trip. Learn to bring what you need and leave the excess behind, while still being safe. Plan to hike in the same outfit everyday and have a warm change of clothes for camp/sleeping. On a multiday trek, wash your clothes!
- Understanding the climate you plan to hike in will help reduce your fears and ultimately your fear packing. Warm midsummer, no major storm system, 2 day backpacking trip in the North East on well known trails does not require 3 layer Gortex hard shell, heavy weight merino wool long johns, insulating layers, rain and wind jackets. Instead, grab a trusty baselayer, lightweight fleece, and a rain jacket that can double as a wind jacket on blustery summits.
Recommended Beginner Items
This is a recommended list for beginners who respect lightweight/ultralight tendencies and plan on moving forward with those goals over the course of their backpacking career. THESE ARE NOT THE CHEAPEST OPTIONS OUT THERE and I understand the numbers can be hard to digest, but with diligent used gear buying, sale purchases, and buying older models you can outfit yourself for much less than these stated numbers (prices relevant as of April 2020). My recommendations are based on durability, community reviews, and performance. These pieces will last you a long time and still are reasonably well priced. Not to mention, you won't be fumble spending or being wasteful with your money, which is priceless.
BIG FOUR: $600-705 $145 Six Moon Designs Skyscape Scout, 40oz HOWEVER I recommend upgrading to their Lunar Solo (26oz, $250)...TarpTent also offers lightweight, affordable 1p/2p tents in the ~$200-300 range
$200 Hammock Gear The Burrow Economy Quilt, 23oz, 800 fill power
$200 Granite Gear Crown2 60L Backpack, 2.12lbs
$55 Klymit Static V Pad, 19oz
CAMP KITCHEN: $85
CLOTHING: $0-$280, depends on what you already have at home
$0 Base Layer: any synthetic technical tshirt and/or long sleeve you already own $0-$90 Midweight: lightweight fleece you already own or Patagonia R1 Fleece
$20 Rain Jacket/Pants: Frogg Toggs
$130 Insulation: MontBell Down Jacket
$40 Socks: Darn Tough x2
Tips & Tricks for Budget Shopping
Research each piece to determine it is actually the correct item for you
Don't buy face value! There is a coupon lurking somewhere or purchase last years model (typically almost entirely the same)
Shop at correct times of the year, heading into summer is a great time to buy winter/fall gear
Buy used, whether it's from REI Garage Sales or online gear sales such as Reddit r/ULgeartrade
Wasted Money Gear I Wish I Never Bought
JetBoil
MSR WindPro II Stove
0F Sleeping Bag
Box Store Tents
65L Osprey Backpack
Cheap headlamp


Comments